Friday, 15 January 2016

The Big Bolt Action Berlin Battle - Xmas Game 2015

As usual these days, I'm behind on the old blogging front. Still, better late than never, let's press on with details of a game from last year...

We've formed a tradition in our little gaming group of spending a full day on games at Christmas, and this gives us an opportunity to tackle something we couldn't manage in a typical evening session.

For 2015, we opted for a large scale Bolt Action game. Given the forces available to us, we came up with a "what if?" fall of Berlin scenario in which US and Soviet forces attacked the German defenders on two fronts and tried to link up. I'd written some overcomplicated scenario rules, which we merrily ditched on the day in favour of fighting each other and just seeing who seemed to have won at the end.

Kieron has written a pretty thorough account for this game already, and if I'm honest I generally just look at pictures of other people's battle reports, so I won't rehash too much detail here. Instead, here are my photos from the day, with just a light dash of commentary to give you some vague idea of what's going on.

The table we set up - all eight feet of it

Kieron looks pleased about something

We still haven't started yet, but
Wes is doing his war photographer bit

Still no forces, but this is the road the Americans would be advancing down

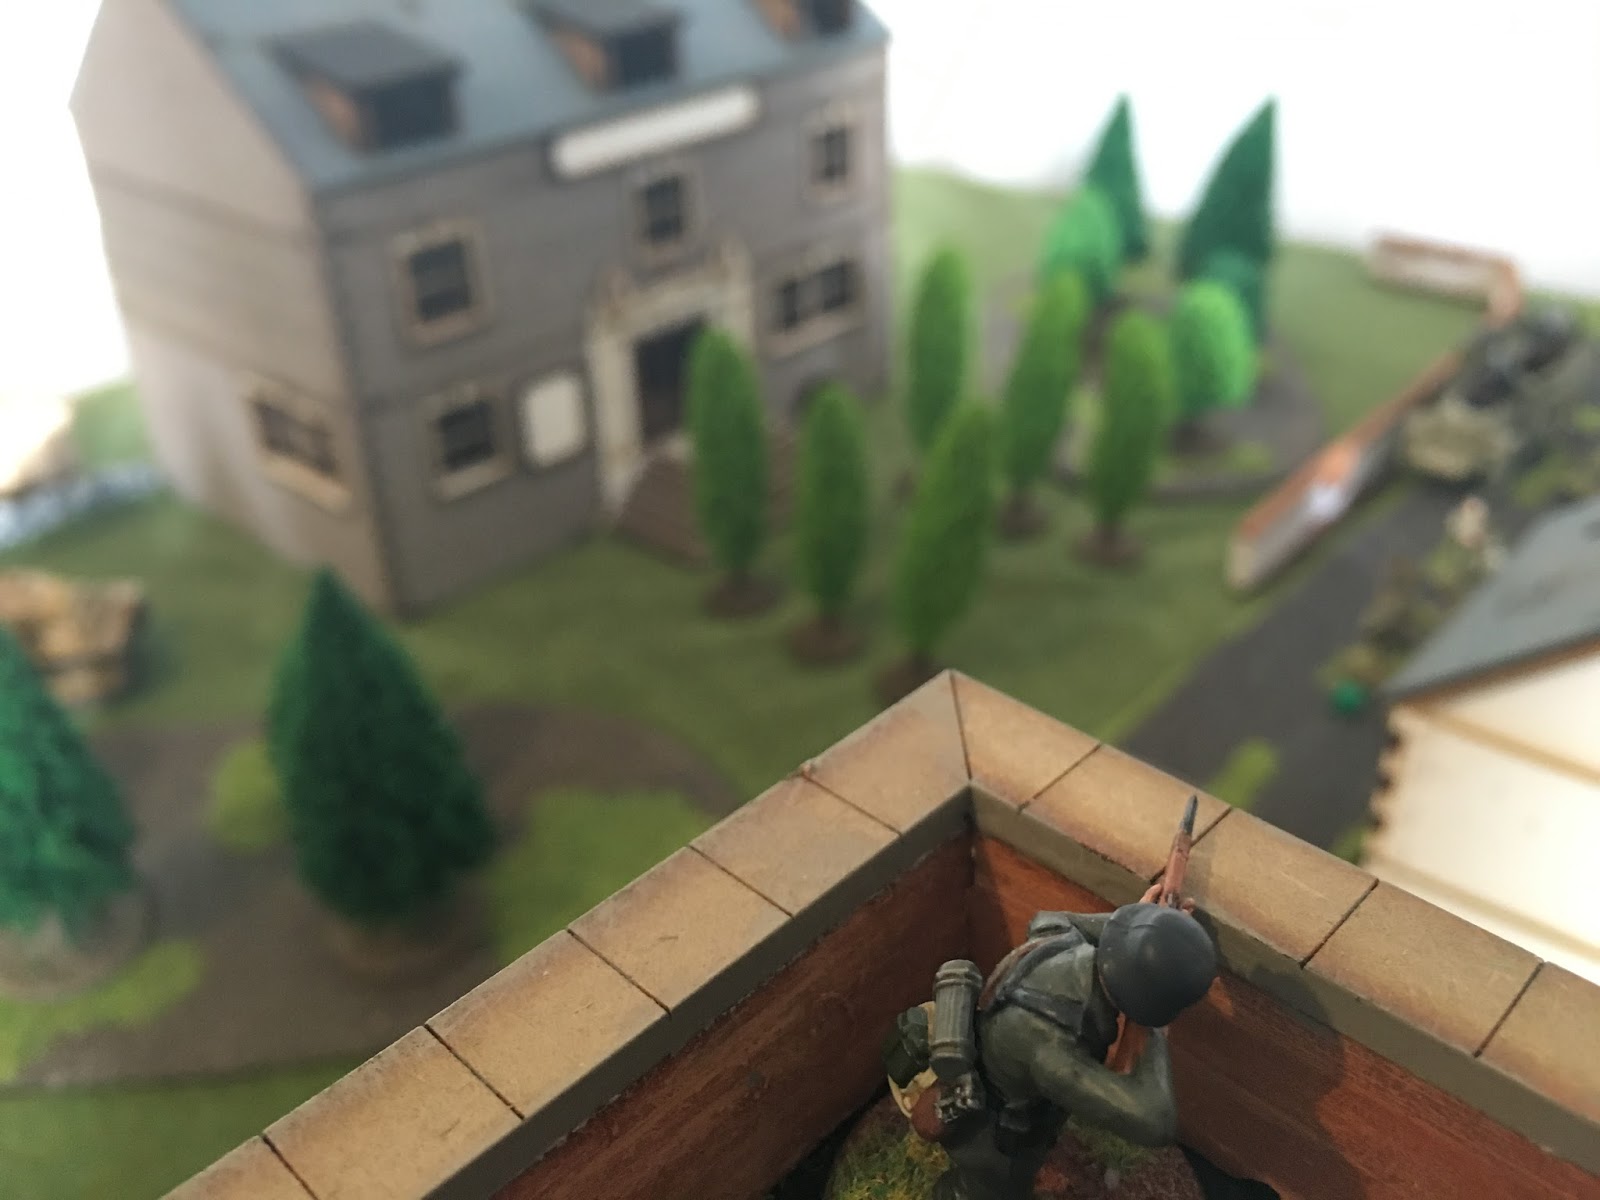
You can't see much, but there are German defenders in there somewhere.
You can see my Panther peeking round the side of the warehouse.

The hedgerow offers little protection to the
volkssturm as they await the American forces

Aiming a big gun down the street seems like a reasonable plan

As the enemy are sighted, the SS dart forward to a prepared position
so that they can cover the road

US infantry arrive and move up the road in their
halftrack, supported by machine gun, mortar, and an
extra squad moving up behind the hotel

The German howitzer and machine gun
bunker open up to little effect

Having been disorganised by an opening bombardment,
the German defenders scramble to face attackers on both sides

Wes holds a smoke marker and seems pleased about it

A second US halftrack arrives

The Americans advance as cautiously as possible,
when faced with a long open road straight to the enemy

The Panzer II moves up and starts firing on the US attackers

A horde of Soviet infantry makes its way
towards the front line, with armoured support


Attack is the best form of defence - an SS unit barrels into the
warehouse in a halftrack to try to flank the advancing Russians

A Russian tank arrives and destroys the SS halftrack,
leaving the survivors somewhat exposed and surrounded

Pete rolls a 6, meaning that the sun rises at the start of turn 2,
giving the defenders a better chance of shooting the
attackers on their way in. It's fair to say he was happy about this outcome.

German veterans move out of a building to
stem the flow of Russians toward the fence

The Puma attempts an audacious flanking
maneouver, and survives to immobilise the T-34

A Sherman and some US infantry creep up, away from the main fighting

Germans leave the shelter of the building to fire
on the infantry but are shot back by the tank

The US advance starts to stall on the road

The rear halftrack is destroyed by the Panzer II,
leaving the survivors pinned and exposed in the street

A sniper looks over the battlefield...

... and sees juicy targets piling out of the haltrack wreck

Taking heart from the presence of the Tiger and the SS,
a volkssturm squad breaks cover to advance into the graveyard

Having been pinned in the preliminary bombardment,
the (veteran) Panther failed to pass an orders test for three turns,
while the other defenders got on with things around it

Soviet forces advance on the barricades

Officers try to keep order as keen but disorganised
volkssturm units swarm around behind the barricades

American GI's pour out of the hotel and fling themselves
at the Panzer II, but aren't lucky enough to damage it

The T34/85, having mocked the nervous Panther for a while, is taken
out by the Tiger which had used the road to move to a new firing position

Soviet forces creep up on the volkssturm barricade

Vicious close range fighting around the yard...

... eventually leaves the Russian attack halted on that flank

Seeing the American attack peter out, the volkssturm in the
graveyard head back towards the barricades to help repel the Soviets

Despite heavy losses, the volkssturm barricade holds

Having finally found its nerve, the Panther rolls out,
and slightly inconveniences an empty truck

With that done, the Panther lurks in the hope
of claiming credit for destroying the T34/85

Having seen off the infantry assault, the Panzer II moves
to the road and destroys the remaining US halftrack

The Tiger rolls forward for a shot on the advancing Sherman,
and hits, but fails to cause any damage

Germans dig in, warily watching the Russian survivors

With the last dice roll of the game, the US airstrike which had been
"incoming" for several turns arrives... and destroys the Sherman,
which had already taken out the Puma and was
rumbling ominously into the centre of the board

We called the game after (I think) 5 turns - at which point the Americans were basically spent, and Kieron didn't think he had enough Russians left to overwhelm the remaining defenders.

We agreed that this was a German victory, and the attack had been repelled, but the Germans had been badly mauled, and the next Allied offensive in the sector would likely wipe them out.

Although I think Wes had lost interest by the end - his units had largely failed to make it into the fight due to bad luck - it was a fun game and it was very good to see so much of our stuff together on the table.

If we were to do it again, we might give the attackers a few more points to play with - defending is usually easier - but it didn't really feel like a German victory was guaranteed.

Anyway, big game done, what can we do next Christmas?

Tuesday, 15 December 2015

Big cat on the prowl...

It turns out, now that I've checked, that by sheer fluke my last post happened to fall on the last day of the 6 Month Mountain Reduction and Painting Challenge for 2015. So, how did I do in the challenge?

Well, my goals were to finish my WW2 French army for Bolt Action, and to complete my Shaltari force for Dropzone Commander.

I managed both! I'm basically stunned by this realisation. My French force has been terrorising Pete's Germans for a while now, and my Shaltari have, er, also been involved in games.

Overall, my numbers for the challenge were:
Painted: 68
Jokers Used: 4
Jokers Earned: 2

Which doesn't seem bad to me at all. I'm really happy with that, and I'm looking forward to repeating the experience again next year.

Anyway, back to unguided painting and mountain reduction. We're planning a big Bolt Action fall of Berlin game for our Christmas all-day gaming session, and I'll be joining Pete on the German side.

To do this I needed to get more points of Germans ready, so a quick way to do this was a to paint a Panther. Which I have.

Big tank!

The turret turns and everything!

This is a Rubicon Models kit, and it went together pretty easily. The only issue I had was the front of the hull, where it didn't quite meet. I've had to use some filler there, but it's not too obvious and will be even easier to miss when there are other things on a table. So I'm happy.

It can even point the other way!


Unfortunately though, I've been forced (forced I say) to take advantage of the sprues sale that Warlord ran recently, so I've acquired 24 German infantry and a tiny truck for the French. So that skews my totals a bit. Ah well.

Right, what's next?


For 2015 so far:
Painted: 126
Bought: 93


Monday, 30 November 2015

A long overdue update - with more Shaltari!

Hello!

Yep, it's been three weeks since my last post, and longer than that since I posted any painting progress. This is because I've been in the throes of a secret project, and I didn't want to tip my hand to Pete "Just War" McSecretpaint by putting pictures up here too early!

So let's hope the incident where the Blogger app decided to "publish" instead of "save" when I added the photos didn't blow the whole thing.

Anyway, here we are at last. I've been beavering away on my latest Shaltari acquisitions for a while - because Pete was one of the first in our group to start a Dropzone Commander force, he's been able to get more options ready and had the advantage of more or less knowing what other players would show up with for a smaller game.

Now I've added some more options of my own, and can take the game size up to 1500 points. Hopefully some things here will be nasty surprises for Pete, but even if not, they should at least make games more interesting by giving me more stuff to suffer a humiliating defeat with.

So here we go, onto the models...

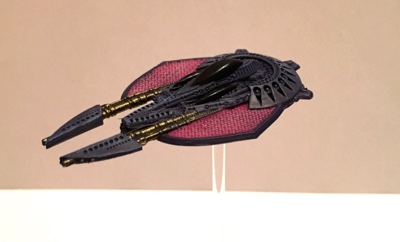
First is a Warspear. This is a fast mover, which means it makes attack runs across the battlefield and can only be targeted by reaction fire. That makes it hard to shoot down and gives it the ability to attack almost anywhere, but I suspect it's lacking in firepower so I'll need to be careful in selecting appropriate targets for it.
Whoosh!

Zoom!


And from underneath!


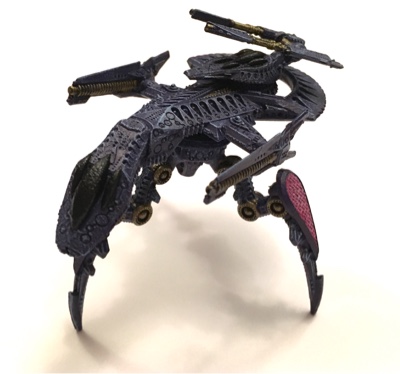
Then, two Tarantula battle striders. These are probably going to actually be my biggest hitters, and I wanted more than two when I went to get them. Sadly, only two were available, so that's what I have.
These have a special weapon that is better at damaging targets with heavier armour - something I've struggled to do up to now.

See? Two.

This one sort of crouches to target something on the ground.

While this one is more upright.

As there weren't any more Tarantulas in stock at the Outpost when I went shopping, I got a Jaguar warstrider. This is a big beast, with it's own AA turret. Ideally this can soak up a bit of fire and still punch back.

To the left...

... and to the right!

Last, but by no stretch of the imagination least, a Firedrake. This is a lovely model, and much bigger when I put it together than I was expecting! I had to get some parts replaced as they were miscast, which has left me with the miscast bits as spares, which I do have a plan for. 
This thing can beam in my troops, flies pretty fast, and has a powerful area effect weapon. I'm just hoping it isn't embarrassingly shot down before it can do anything!

*glides past menacingly*

So big the backdrop can't contain it!

View from above. Yes, this was fiddly to paint.

And breathe!

As is customary, let's see what that did to my numbers...

For 2015 so far:
Painted: 125
Bought: 68

And for the Challenge:
Painted: 68
Jokers Used: 4
Jokers Earned: 2


Thursday, 5 November 2015

The Just War Doctrine

Recently, our merry band convened for our second game of Black Powder using 6mm American Civil War models.

In the first test game, *mumble* months ago, each side consisted of just a few infantry units, so we could get a handle on the rules. Kieron and I had the union forces, against Wes and Pete's confederates.

It was in that test game that Kieron made the error of saying "that's just war" when Wes was bleating about the small disparity of numbers on each side. Black Powder doesn't use points, you see, so we'd just lined up the very small forces we had available and had at it. There was some scenario that we came up with, but at this remove I've no idea what it was.

Anyway. The "just war" comment seems to have made something of an impression. Pete in particular was so upset by it that he painted an entire army, in secret, before the next game. Wes also increased the size of his force and added some artillery. This feat is particularly impressive when you consider that Wes and Pete would both have had their vision blurred by bitter tears this whole time. The "that's just war, dickheads!" banner on Pete's command stand was a particularly stirring touch.

So, what we, the gallant and sportsmanlike players on the union side, thought would be another small skirmish was in fact a case of a very small union force being caught on the hop by a much larger formation of sneaky rebels!

The Black Powder rules really shone here. We were able to quickly come up with a rough scenario - the union force would try to retreat the length of the table, while partly encircled by the confederates. We figured that if the union could escape with more units than it lost, that could count as a union win - anything else would go to the confederacy. As simple as that! We deployed the union force around a small farm, with the confederates off the table - they would move on in their first turn.

I took pictures, but I can only vaguely remember what happened here, so I'll try to roughly sketch it out with the aid of the photos.


We'd decided that my mid-sized brigade would try to stall the rebel advance, so I lined it up by the farm in order to intercept Pete's large infantry force as it moved forward.


At the same time, Kieron's two smaller brigades struck out towards the location of the confederate flanking force. The hope was that they could fight through there, and then have a fairly open line of retreat.


Artillery opened up on my position, but mercifully didn't achieve much. I didn't have much to do there really, so fell back to the foot of a hill.


Pete's force got a bit disorganised (we'd decided that the rebels would be inexperienced so they had to roll a die to see if they got into trouble the first time they attacked) but in general they were rolling toward me. My plan was to retreat in stages, with a regiment firing at the advancing enemy as the rest of my force pulled away.


Kieron and Wes clashed, and things got messy there. After some shooting and even some charges, both of Wes' brigades had broken, but so had one of Kieron's. Kieron's second brigade wasn't looking too healthy either.


Pete's cavalry tried to get involved, but repeatedly did so badly on orders tests that it could only trot forward a bit and never actually met the enemy.


Back at the hill, I got into trouble. It all looked so simple - just keep falling back and give some fire to put the rebels off their stride - but I just couldn't get the dice to agree, and I failed the orders test several times in a row.


Thus it was that Pete's infantry was able to pour fire into mine and even bring up a cannon for enfilading fire, while I was caught out of formation and barely able to do anything in return. Eventually, my force succumbed to the inevitable and broke.


On the flank, Kieron made a try at rescuing something, but with only a single target left to aim at, the confederates were able to break his remaining brigade too.


So a loss to the union, but not a terrible one given the circumstances - we at least got rid of a couple of enemy brigades.

As I said earlier, I was impressed with how Black Powder handled this very uneven matchup. Right until the end, it never felt like there was nothing that Kieron and I could do, it always felt like a bit more luck would have seen us through it.

So it's a shame that we can never play it again, really...


Friday, 23 October 2015

Roman Around

Recently, Pete's been very excited by tiny elephants.

He painted up a couple to go with his 15mm Carthaginians, which were part of our Impetus project from a while ago.

Fortunately, I have a 15mm Republican Roman army for Impetus from even longer ago, so we decided to give Basic Impetus a go to ease ourselves back in. This is so quick that we managed two games in an evening!

For once, I remembered to take some photos, although I can't definitively remember what actually happened, so I'll have a look at the photos and guess...

The first game
Roman legions stick together and tentatively
send cavalry and skirmishers forward

Unfortunately this leaves the Carthaginians free to send
cavalry down the flank...

Elephants stomp forward making as much noise as possible

Legionaries brace for elephant impact,
while the levites start throwing things 

Elephants trample the skirmishers and slam into the Roman line,
while the Roman cavalry on the left charges a Gallic warband.
The Roman cavalry on the right had been brought down by javelins by this point.

Cavalry threatens the Roman flank...

...which surges forward to get out of the way, having
eventually brought the elephants down.
More levites move up to try to face this threat.

Eventually enough carnage occurred that both sides routed. A draw!
The second game

We both tried a different setup.
Due to some very good rolls, my cavalry
had a ridiculously successful early charge.

The forces square off, and I forget to take any more pictures.

The second game went much the same as the first - Basic Impetus does make forces less likely to do anything complicated as they can't do multiple moves. Unfortunately, the second time round my force routed when I was 1 point away from breaking Pete's, which I suppose is technically a win for him...

These were very enjoyable games, despite the limitations of Basic Impetus (and the fact that I was playing Pete (hi Pete)). We both agreed that we should move back to the full Impetus rules for future games, so hopefully I'll have something to report on that soon enough.


Friday, 9 October 2015

Struggling to Contain Myself

I'm sure people must think I do some of my painting just to enable hilarious blog post titles like this one. I couldn't possibly comment.

Anyway, a bit more painting. These are the 10mm shipping containers I bought at Derby Worlds, for use as scatter terrain for Dropzone Commander.


These are from The Baggage Train, they're not the cleanest castings in the world but for something like this, especially at this scale, it doesn't really matter.


Anyway, I'll be hiding behind these in due course!

And now more numbers...

For 2015 so far:
Painted: 119
Bought: 68

And for the Challenge:
Painted: 62
Jokers Used: 4
Jokers Earned: 2