You'll now be subjected to a brief description of each of these. I'm sorry, but that's just the way it is.
The thrill ride begins with these post-apocalypse barricades from Crooked Dice. These are really simple bits that were thus really easy to paint, and will also work for a few other projects I have in mind, so it's a bit weird that they'd sat unpainted for a few years up to this point.
We then continue with these MDF scaffolding bits from TT Combat. I think that despite my newfound love of 3D printing, MDF is still a good way to go for simple bits like this that don't need a lot of detail. In Necromunda terms they're good as a way to add some height, and crucially have ladders so they'll give a way to move fighters up and down the levels.
Bit more random here. The barrier on the left is from the toy lorry I used to make the Stiglet truck back in 2021, and it had been sitting around as "dead easy to paint and use" ever since.
On the right is the clock thing I showed in the previous post, but I don't think I showed the back of it then, and hey, it fits in here.
But more interesting is the statue in the middle. That's from one of my first efforts at 3D printing, and it had, like so many things, sat around unpainted for ages. That was partly because I didn't know how to tackle it, but then I stumbled on the Citadel Technical paint Nihilakh Oxide, which allowed me to get this verdigris effect that I really like. So more of that likely to show up at some point.
These are the worst "sat in the garage unpainted" offenders, as they're barricades from Gorkamorka, which I've owned since its release in 1997. Bit of drybrushed on rust works ok (and I promise, looks better in real life than in this photo). Another one I might look for a specialist paint for though - rusting metal is always likely to crop up.
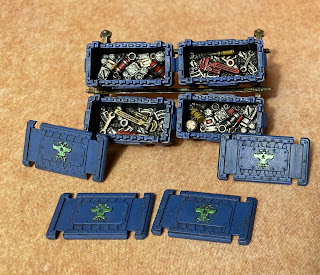
Now we hit the real seam of tedium, as I go through several photos of parts from the GW Underhive Market set. Look, these boxes have contents...
... but you can also put the lids on them! Astonishing.
These boxes, on the other hand, don't really have a bottom so you can only put them like this (or stack them if you're feeling especially adventurous).
The market stalls! I had fun messing around with these, although it's a bit of a shame that you don't really have options in how you put them together...
... so these are the same thing again in different colours, basically.
Finally, this is a 3D print I found on Cults. I'm reasonably pleased with how it's come out in the end, but getting this to print properly was a bit of a nightmare - the walkway at the top is a mesh, which prints nicely in resin but then went all wavy as it cured, so I've gone for printing in PLA but having quite a scrappy result instead. I've gone fairly heavy with the rust which I think makes everything ok - and it's not exactly a centrepiece so I don't think it really matters anyway. But still, bit of a faff, partly I suspect because I should have thought more about how to set it up for printing.
Still, there you go, a decent chunk of scenery just in time for us to largely abandon the Necromunda campaign. Success!


No comments:
Post a Comment